In the bustling world of business and home life, carpets silently bear the brunt of foot traffic, spills, and stains, gradually losing their luster and inviting unwelcome odors. However, with the expert touch of Clean Group, your carpets can undergo a transformation. Our comprehensive guide delves into the art and science of carpet cleaning, unveiling insider tips, innovative techniques, and eco-friendly solutions to breathe new life into your carpets. From removing stubborn stains to reviving plush fibers, embark on a journey to rediscover the true beauty of your space. Get ready to witness the magic of Clean Group as we embark on a carpet cleaning adventure like no other.
Revive Your Carpets: Expert Tips for a Fresh Home

Carpets endure daily wear and tear, but with the right approach, you can breathe new life into them. Our blog explores expert tips for rejuvenating your carpets, from tackling tough stains to restoring their original softness and vibrancy. Discover simple yet effective techniques that will leave your carpets looking and feeling fresh, transforming your home into a welcoming oasis. With insights from seasoned professionals, you’ll learn how to address common carpet cleaning challenges with confidence, achieving remarkable results without the need for expensive equipment or harsh chemicals. Say goodbye to dingy carpets and hello to a revitalized living space that you can be proud of.
Deep Dive into Carpet Cleaning: Say Goodbye to Stains
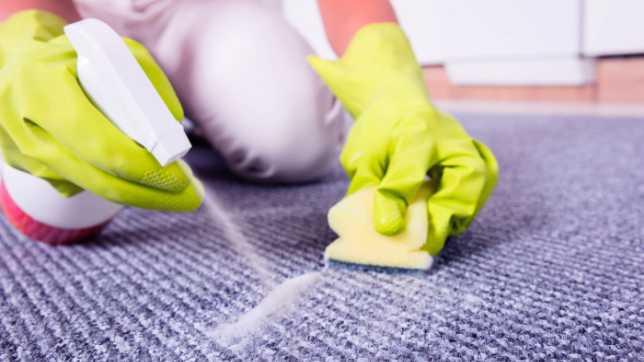
Stains on carpets can be a nuisance, but they don’t have to be permanent. In our blog, we take a deep dive into the world of carpet cleaning, offering practical strategies to effectively remove even the toughest stains. Explore the science behind stain removal and learn how to identify the best cleaning solutions for different types of stains. Whether you’re dealing with wine spills, pet accidents, or muddy footprints, we’ve got you covered with expert tips and tricks. Say goodbye to unsightly stains and hello to spotless carpets that enhance the beauty of your home. With our comprehensive guide, you’ll be equipped to tackle any stain with confidence and ease.
Transform Your Space: The Power of Clean Carpets
Carpets play a significant role in shaping the ambiance of your space, and maintaining their cleanliness can truly transform the look and feel of your home or office. In our blog, we delve into the transformative power of clean carpets, exploring how regular maintenance can breathe new life into your living or working environment. Discover how fresh, spotless carpets can instantly brighten up a room, creating a welcoming atmosphere for family, guests, or clients. With insights on effective cleaning techniques and the importance of routine care, you’ll unlock the full potential of your carpets to elevate the overall aesthetic appeal of your space. Say hello to a cleaner, fresher environment where every step feels like a breath of fresh air.
Secrets of Professional Carpet Cleaning Unveiled
Ever wondered how professional carpet cleaners achieve such impressive results? In our blog, we pull back the curtain to reveal the secrets of professional carpet cleaning. Gain valuable insights into the techniques, tools, and products used by industry experts to tackle even the most stubborn stains and deeply embedded dirt. From hot water extraction to dry cleaning methods, explore the pros and cons of different approaches and learn how to choose the best option for your specific carpet type and cleaning needs. With insider tips from seasoned professionals, you’ll be empowered to achieve professional-quality results in the comfort of your own home, saving both time and money in the process. Say goodbye to mediocre cleaning results and hello to a spotless, refreshed carpet that looks and feels like new.
Clean Carpets, Happy Home: Essential Cleaning Hacks
Clean carpets are not just about aesthetics; they contribute to the overall happiness and well-being of your home. In our blog, we uncover essential cleaning hacks that will help you maintain pristine carpets and create a happier living environment for you and your family. Explore simple yet effective tips for regular maintenance, such as vacuuming techniques, spot cleaning methods, and odor removal strategies. Discover how to prevent common carpet problems like matting, fading, and mold growth with proactive care and attention. By incorporating these cleaning hacks into your routine, you’ll not only prolong the lifespan of your carpets but also enjoy a healthier, more comfortable home environment. Say goodbye to stress and frustration and hello to a happier home with clean, fresh carpets that you can be proud of.
Maximize Carpet Lifespan: Pro Cleaning Strategies
Carpets are a significant investment, so it’s essential to maximize their lifespan through proper care and maintenance. In our blog, we share pro cleaning strategies that will help you extend the life of your carpets and protect your investment for years to come. Learn about the importance of regular vacuuming, professional deep cleaning, and proactive stain prevention techniques. Discover how to identify signs of wear and tear and address them before they escalate into more significant issues. With expert guidance on choosing the right cleaning products and methods for your specific carpet type, you’ll be equipped to keep your carpets looking and feeling like new for longer. Say goodbye to premature wear and tear and hello to carpets that stand the test of time with our pro cleaning strategies.
From Dingy to Dazzling: Mastering Carpet Care
Transforming dingy carpets into dazzling focal points of your home is easier than you think. Our blog guides you through mastering carpet care, offering practical tips and tricks to revive even the most tired-looking carpets. Explore the importance of regular maintenance routines, including vacuuming, spot cleaning, and professional deep cleaning. Learn how to tackle common issues like stains, odors, and matting with confidence, using simple yet effective techniques. Discover the power of steam cleaning and dry cleaning methods to lift dirt and grime from deep within carpet fibers, restoring their natural beauty and softness. With our comprehensive guide to carpet care, you’ll unlock the secrets to maintaining dazzling carpets that elevate the aesthetics of your home and leave guests impressed. Say goodbye to dingy carpets and hello to a brighter, more inviting living space with our expert tips.
Spotless Carpets: Insider Tricks for a Cleaner Home
Achieving spotless carpets is a key component of maintaining a cleaner and more inviting home environment. Our blog uncovers insider tricks that will help you achieve pristine carpets with ease. Explore innovative cleaning techniques and products that go beyond traditional methods, targeting stubborn stains, odors, and dirt buildup effectively. Learn how to create DIY carpet cleaning solutions using everyday household items for a cost-effective and eco-friendly approach. Discover the importance of regular carpet maintenance routines, including vacuuming schedules and professional deep cleaning intervals. With our insider tips, you’ll be equipped to tackle even the toughest carpet cleaning challenges, leaving your floors looking and smelling fresh year-round. Say goodbye to unsightly stains and hello to spotless carpets that enhance the beauty and comfort of your home for you and your loved ones to enjoy.
Eco-Friendly Carpet Cleaning: Green Solutions That Work
Eco-friendly carpet cleaning offers a sustainable alternative to traditional cleaning methods without compromising on effectiveness. Our blog explores green solutions that work wonders for your carpets and the environment. Delve into the world of eco-friendly cleaning products, from natural carpet shampoos to homemade vinegar solutions, and discover their powerful cleaning properties. Learn how to minimize water usage and reduce waste while achieving optimal cleaning results, contributing to a healthier planet and home. Explore innovative cleaning techniques, such as steam cleaning with environmentally friendly detergents, that effectively remove dirt and allergens without harmful chemicals. With our guide to eco-friendly carpet cleaning, you’ll embrace a greener approach to household cleaning while enjoying fresh, clean carpets that are safe for your family and the planet. Say goodbye to harsh chemicals and hello to a cleaner, greener home with our eco-friendly solutions.
Conclusion
achieving clean, fresh carpets is within reach with the right knowledge and approach. Whether you’re dealing with stubborn stains, odors, or general wear and tear, our blog has provided valuable insights and techniques to help you revitalize your carpets and transform your living space. Remember to implement regular maintenance routines and consider eco-friendly cleaning solutions for a healthier home environment. For professional assistance or further inquiries, don’t hesitate to contact Clean Group at 02 91607469. Located at Suite 1B, 189 Kent Street, Sydney NSW 2000, our team is dedicated to providing top-notch cleaning services tailored to your needs. Let’s work together to keep your carpets looking their best!
![How to Choose the Right Cleaning Company? [4 Crucial Facts]](https://www.clean-group.com.au/wp-content/uploads/2022/02/after-builders-cleaning-1.png)