Be honest with us, when was the last time you cleaned your AirPods? It is usual for people to go months without even bothering about checking how clean their AirPods are. However, this is a bad habit that we should fix today.
Firstly, it’s extremely unhygienic. AirPods tend to accumulate dirt, earwax, germs, and all kind of nasty stuff in them. Second, not cleaning your AirPods could cause damage in the long run. People have spoken out about their AirPods lowering their sound quality after a long time without being cleaned.
If we’re being completely honest, cleaning these devices isn’t a difficult chore. It is only going to take you about 20 minutes, and afterward, you’re going to be able to enjoy that high-quality music you know and love.
That’s why we created this handy guide on how to clean your AirPods in an efficient and entirely safe way. Don’t worry about damaging anything; follow the steps, and you should be good to go.
When to Clean Your AirPods

If you find yourself wondering whether you should clean them up or not, the answer is probably yes. That’s because no matter how hygienic we are with our ears, there’s always going to be a wax build-up in our AirPods.
However, there are some crucial moments when you should clean them. Some of them are:
- If you want to re-sell them
- Every couple of months
- If they don’t sound the same as when you bought them
- When you see the wax building up inside of them
Materials
Now that we’re ready to begin with the cleanse, we are going to need several materials to make sure our AirPods end up as clean as possible. Make sure to write them down:
- Cotton swabs
- 70% isopropyl alcohol
- A toothpick
- Lint-free cloth
- A small air pump (optional)
- Toothbrush (optional)
Clean the Case
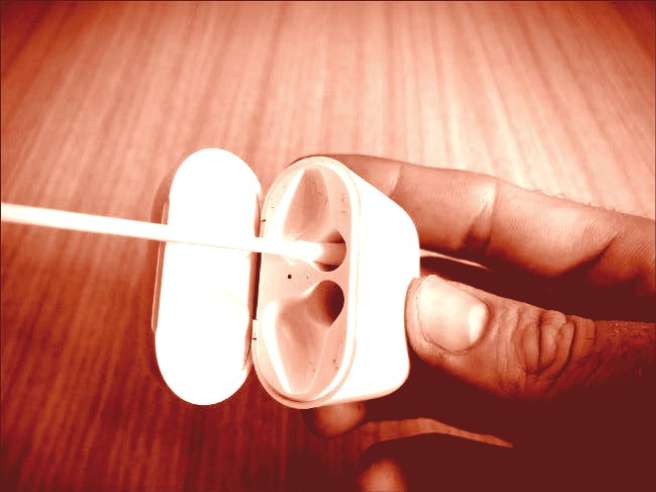
We’re going, to begin with the largest part of the set, which is the case. Firstly, you need to take the AirPods out and put them aside while we’re working on the case.
Then, damp up the lint-free cloth with a bit of isopropyl alcohol and rub it all over the case, making sure you clean any trace of dirt that might be stuck in its cracks.
Afterward, dampen a cotton swab and gently rub it against the insides of the case to loosen up the wax. Apple recommends against poking the charging holes with a pointy end, but there shouldn’t be any problem if you use a delicate q-tip. Do that until you see the wax starting to come off.
The next step is getting your toothpick and delicately scraping off any residue of wax that might be too stubborn to come out with just the cotton swab. By all means, do not poke the charging hole at the bottom with the toothpick. It could permanently damage the connections.
Then, you can take your manual air pump and blow some pressured air on the difficult spots you might find all over the case. Finally, wipe it all with your cloth, and it should be as good as new.
Clean the Pods
Now we can dive into cleaning the actual pods. In order to do this, you need to be extra meticulous to make sure you don’t damage the grids; otherwise, you would have to say goodbye to your wireless friends.
Something that you should be aware of is that you shouldn’t be getting your AirPods wet, no matter the circumstance. Hence, if you’re going to be using any liquid, please use small amounts, and do it at your own risk.
Loosen up the Wax
This is the moment when we’re going to be using our cotton swabs and isopropyl alcohol. Make sure you don’t oversaturate your q-tips with alcohol to avoid damages. If you want to be safe while doing this, you can take an alcohol prep pad and wipe your cotton swab with it.
Next, you’re going to gently wipe all the entrances and try to loosen up all the accumulated wax you can find. However, in most cases, using a cotton swab isn’t going to be enough to get these pods clean.
Get Rid of the Wax
Now it’s the time for the deep cleanse. In this step, you have two main options. However, you can use both if you want to ensure the best of results.
The first option is getting your toothbrush and using it to brush away all the remaining dirt and wax that you can find inside your pods. Preferably, use a new toothbrush that isn’t going to be used on any living being afterward.
However, the second option is a lot more meticulous. It consists of using a toothpick to scrape off all the wax residue you can. If you want to use this option, please be extremely careful, as you could easily break the membrane in the pods.
Air Pump the Remains
This step is pretty straightforward; now that you have cleaned everything as best as you can, you can take your manual air pump and use it to make sure all the particles are off the surface of the pod.
You can even go ahead and use it to clear out the charging hole without any probability of damaging it.
Let the AirPods Dry
The final step is simply to make sure the alcohol isn’t going to cause a shortcut in the pod’s system. All you have to do is lay your AirPods face down for a couple of hours, and they’re all ready to use.
Bottom Line
Remember that the most important part of any cleaning process is doing it regularly to prevent it from getting worse over time.
Also, let us give you a quick tip. If you did all of this and your AirPods are still sounding weird: blow on them as hard as you can. Several people have reported that this trick has magically worked for them. Hence, it might work for you too.
Don’t hesitate to check out the rest of our website for more cool articles on how to clean things!
About the Author
Stephen Matthews
Hi, my name is Steve. I have been working as a Regional Operations Manager in Sydney Clean Group for almost four years now and manage a team of 10. I have more than three decades of experience in the commercial cleaning industry. My responsibilities include the day-to-day management of cleaning operations, planning, online quotation to clients, managing cleaners’ performance, collecting clients' feedback, and ensuring proper & regular maintenance of cleaning equipment. Get in touch for a quick chat about your cleaning needs.
Read More About Stephen